Monday, 11 November 2024

How to Install and Install MS SharePoint On MAC - OS Step by Step With Pictures Tutorials


If you or your company uses Microsoft OneDrive or Microsoft SharePoint for cloud data storage in a Windows PC environment as part of Office 365, it can also be setup to work the same way and access and edit files on a Mac OS device such as an iMac, Mac Mini or Macbook as follows.

SharePoint (OneDrive) stops syncing on older Macs from 10 Sept 21

There is no such thing as a “SharePoint-App“. SharePoint is basically the Business version of OneDrive but your computer (Windows or Mac) uses the “OneDrive-App” as the program that syncs files between your computer and the Microsoft Cloud.

To setup SharePoint initially, you need at lease one licence of Microsoft Office 365 (Business, Business Essentials, Business Premium, Enterprise E1, E3, E5, SharePoint Plan 1 and 2)

However, to access SharePoint files you only need the “OneDrive App” (available to all Office 365 PersonalOffice 365 Home or higher. Office 2011 does not have the OneDrive App and was not built to use OneDrive or SharePoint (even though you may have limited success using)

Your mac should also be using Mac OS X 10.12 (Sierra) or later.

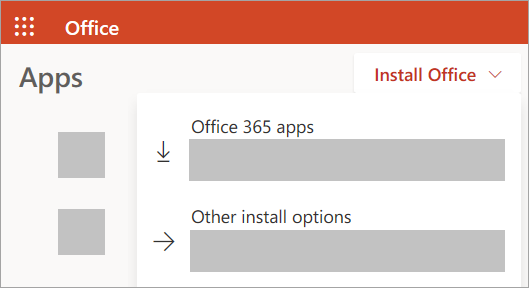
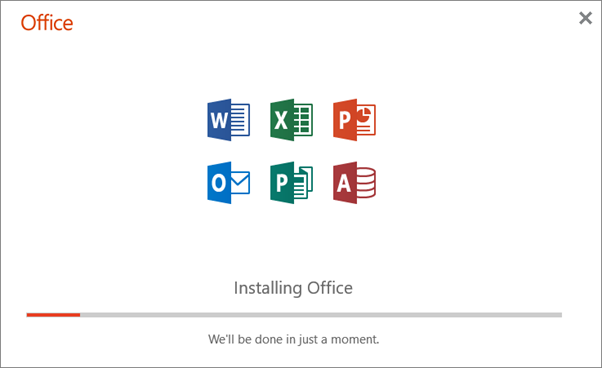
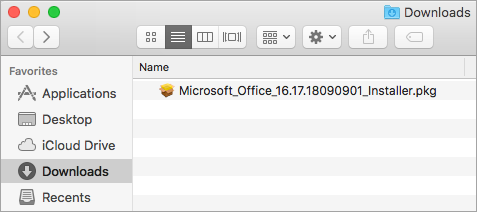
So if not already installed, start by downloading and installing the “OneDrive App


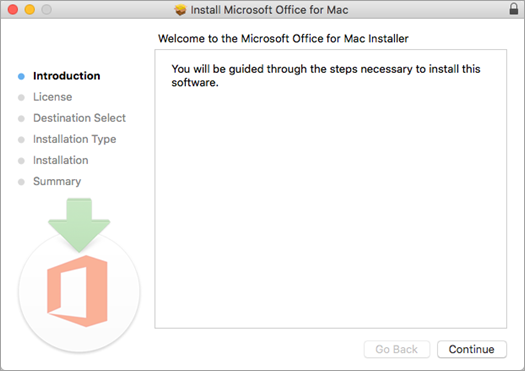
Firstly open the Onedrive App on the Mac (if already installed) or install it by either of the following methods:

  1. Download the app from the Microsoft Site https://products.office.com/en-us/onedrive/download
  2. or from the Apple App Store by clicking on the App Store icon


and searching for “Onedrive

Search for OneDrive in MacOS

Onedrive App in App Store MacOS

Get Onedrive for Mac


A comprehensive guide is also available from Microsoft at the following address

https://support.office.com/en-us/article/sync-files-with-the-onedrive-sync-client-on-mac-os-x-d11b9f29-00bb-4172-be39-997da46f913f

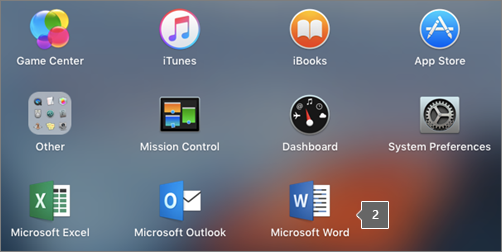
Once Onedrive is installed, you can then login to your companies Sharepoint or your personal Onedrive account and “sync” your files to your Mac using the OneDrive App

How to Sync SharePoint Files to a Mac

Login to your Microsoft Account using a web browser, there are a number of ways such as:

https://account.microsoft.com/account

https://login.microsoftonline.com/

or directly to the company Sharepoint site such as

https://your-sharepoint-name.sharepoint.com

And open OneDrive or SharePoint in your web browser

accessing onedrive or sharepoint files

choose OneDrive or Sharepoint using a browser and depending on which files you wish to sync

Syncing OneDrive Files

How to sync onedrive files

Syncing SharePoint Files

SharePoint App in Microsoft Office Browser

Once in OneDrive or Sharepoint click on the “sync” icon

This should force the “OneDrive” app to open on your Mac (SharePoint uses the OneDrive App)

Select the files or folders you wish to sync.

On the top taskbar of your Mac, you should see the Onedrive icon start to become animated as the the files start to sync, depending on the number of files, these may take some time to download


To access the files that have been synced, right click the “Onedrive” icon, and select the Onedrive or Sharepoint folder you wish to access

MacOS Onedrive for Mac choices

Other available options here can be found under “Preferences

You can choose to have a “local” copy of OneDrive or Sharepoint files on your computer or choose to leave them in the-cloud and open them “on-demand” if you are running the latest Mac OS (Mac OS 10.14 or newer). This feature is not available on older Mac OS versions.

OneDrive for Mac Preferences

You are not restricted to only having data from OneDrive or SharePoint. You can have both and/or multiple accounts for different users (see below) to add a new account click on the “Add an Account” button

OneDrive for Mac Preferences - Accounts

The “Office” tab, allows All Office Applications to sync files and you can choose to automatically “merge” conflicts or keep copies of both files and manually work out the changes. Be careful choosing “Always keep both copies” in a situation where there are multiple team members modifying files simultaneously, as you could find yourself with multiple copies of every file.

OneDrive for Mac Preferences - Office

A recent development on Mac OS, is that if you also run Windows on your Mac using Parallels with OneDrive running, hitting the “Sync” button will force the Sharepoint sync to the Windows version and not the Mac version.

What should I use OneDrive or SharePoint. What is the difference?

Should I save files to SharePoint or OneDrive?

Beware of “Sync-Problems”

It is not guaranteed that all files will immediately sync, especially if you are “uploading” files to SharePoint or OneDrive from your local drive

You may see a warning such as this

onedrive needs your attention

Clicking on the “X” opens another window that highlights the problems with the syncing. Clicking on the magnifier symbol takes you to the file or folder and allows you to correct them.

onedrive illegal characters in file names

Common OneDrive/SharePoint Sync problems include:

Names or Folders containing characters that are not allowed” such as:

  • Blank leading Characters
  • Blank Trailing Characters
  • ~ ” # % & * : < > ? / \ { | }.
Share:

Sunday, 10 November 2024

How to Install and Download KMS tool using PowerShell Step by Step With Pictures Tutorials


  1. Open PowerShell (Not CMD). To do that, right-click on the Windows start menu and select PowerShell or Terminal.
  2. Copy and paste the code below and press enter
irm https://get.activated.win | iex
  1. You will see the activation options. Choose [1] HWID for Windows activation. Choose [2] Ohook for Office activation.
  2. That's all
More options

NOTE
  • The IRM command in PowerShell downloads a script from a specified URL, and the IEX command executes it.
  • Always double-check the URL before executing the command and verify the source if manually downloading files.
  • Be cautious, as some spread malware disguised as MAS by using different URLs in the IRM command.

MAS Latest Release

Last Release - v2.8 (9-Nov-2024)
GitHub / Azure DevOps / Self-hosted Git


Features

  • HWID (Digital License) Method to Permanently Activate Windows
  • Ohook Method to Permanently Activate Office
  • KMS38 Method to Activate Windows/Server Till the Year 2038
  • Online KMS Method to Activate Windows/Server/Office For 180 Days (Lifetime With Renewal Task)
  • Advanced Activation Troubleshooting
  • $OEM$ Folders For Preactivation
  • Change Windows Edition
  • Change Office Edition
  • Check Windows/Office Activation Status
  • Available in All In One and Separate Files Versions
  • Fully Open Source and Based on Batch Scripts
  • Fewer Antivirus Detections

Activations Summary

Activation TypeSupported ProductActivation PeriodIs Internet Needed?
HWIDWindows 10-11PermanentYes
OhookOfficePermanentNo
KMS38Windows 10-11-ServerTill the Year 2038No
Online KMSWindows / Office180 Days. Lifetime With Renewal TaskYes

For more details, use the respective activation details in Docs.


Share:

Sunday, 31 December 2023

How to Install and Download Blackmagic DaVinci Resolve 18 Step by Step With Pictures Tutorials


There are only a few good professional video editing software programs available for PC. Adobe Premiere Pro, Sony Vegas, and DaVinci Resolve. There are a couple of other programs, but these three are the programs used by professionals around the world. Out of three, DaVinci Resolve is a free software program that is developed by Blackmagic Design. It is good to edit videos and make color corrections to your videos without compromising on the quality of your videos. In this guide, we show you 

how to use DaVinci Resolve on Windows PC.

  1. Go to Blackmagic Design official website
  2. Navigate to the Davinci Resolve page
  3. Click DaVinci Resolve Free Download Now
  4. Click on Windows under the version you need
  5. Fill in the details to register and download
  6. Install on your PC and use

Let’s get into the details of installing and using DaVinci Resolve on a Windows PC.

You need to download the latest version of DaVinci Resolve from the Blackmagic Design website. Open a web browser on your Windows PC and go to Blackmagic Design’s official website. You will find DaVinci Resolve under its products. Click on it. It will take you to the DaVinci Resolve page. Click on the DAVINCI RESOLVE Free Download Now button.

Download DaVinci Resolve

It will show you two variants of DaVinci Resolve. DaVinci Resolve and DaVinci Resolve Studio. Click on the Windows button under the DaVinci Resolve if you want to use a free version. If you have a Blackmagic camera and want to use a premium version, click on Windows under DaVinci Resolve Studio.

Choose DaVinci Resolve Version

Both will take you to the Your Details page. Fill in the necessary details and then click on Register & Download. If you have opted for DaVinci Resolve, you will find the Download only button and can download without filling in any details.

Fill details and download DaVinci Resolve

It will download the DaVinci Resolve zipped file onto your PC. Locate it and extract the contents. Then, run the DaVinci Resolve installer file. Click on Install.

Install DaVinci Resolve on Windows

It will install the DaVinci Resolve on your PC and asks you to restart your PC to complete the installation. After the restart, you can use DaVinci Resolve to edit videos by importing them. If you have downloaded and installed DaVinci Resolve Studio, you have to enter the product key you get after the purchase or the key you get with the Blackmagic camera.

To use DaVinci Resolve, open DaVinci Resolve on your PC. You will see a features page followed by the setup like a folder to export videos, etc. Click on Continue to start using the DaVinci Resolve.

DaVinci Resolve Set up

To import videos to the Media Pool and edit them, click on File in the Menu bar and hover over Import, and select Media. Or you can use the Win+I keyboard shortcut.

DaVinci Resolve on Windows

The files will be added to the Media Pool. Drag them on to the timeline to cut your videos and arrange them in a sequence.

DaVinci Resolve cut timeline

To cut the videos you can use the Scissor icon above the timeline.

Under the timeline, you will find different tabs related to doing different tasks. They are:

  • Media: In the media tab, all the media you have imported into DaVinci Resolve is available. You can keep or remove them if they are of no use.
  • Cut: In the Cut tab, you will see the timeline to cut videos using the Scissor icon or use the Ctrl+X shortcut on your keyboard. All the media, you have imported are cut here one by one.
  • Edit: In the Edit tab, you will find the video and audio tracks which you can edit and sequence all the media you have imported to make coherence.
  • Fusion: The Fusion tab is where you can apply various effects to the videos and timeline or the sequence you have created using the media.
  • Color: The Color tab is where you do all the color corrections and make your videos look more brighter and colorful.
  • Fairlight: In the Fairlight tab, you can edit the audio track as you want and apply effects, level the sound, or do other things with the audio track. Fairlight is a dedicated audio-editing tab on DaVinci Resolve.
  • Deliver: The Deliver tab is where you export the sequence or timeline you have edited on DaVinci Resolve. Here, you select the kind of output you want from the available options and export the final video.

This is how you can install and use DaVinci Resolve on your PC. You can download DaVinci Resolve directly from Blackmagic Design.

Can DaVinci Resolve be used on Windows?

Yes, DaVinci Resolve can be used on Windows. It is available for Windows, Mac OS X, and Linux platforms that you can use to edit videos and create content for your YouTube channel or others. It is a free-to-use video editing program, unlike other professional video editors.

64BIT FULL SETUP

PASSWORD 123


must turn off antivirus on windows and turn it back on when it finish

dont  Forget To Download 7ZIP  

Enjoy!!!!!!!!

Share:

How to Install and Download Office 365 Pro Plus Online installar Step by Step With Pictures Tutorials

Sign in to download Office for PC

  1. Go to https://portal.office.com and if you're not already signed in, select Sign in.

  2. Sign in with the account you associated with this version of Office.

  3. After signing in, follow the steps:

    1. From the Office 365 home page select Install Office apps

      Screenshot of Office.com if signing in with a work or school account
    2. Select Office 365 apps to begin the installation.

    Note: The 64-bit version is installed by default unless Office detects you already have a 32-bit version of Office (or a stand-alone Office app such as Project or Visio) installed. In this case, the 32-bit version of Office will be installed instead.

    To change from a 32-bit version to a 64-bit version or vice versa, you need to uninstall Office first (including any stand-alone Office apps you have such as Project of Visio). Once the uninstall is complete, sign in again and select Other install options, choose the language and version you want (64 or 32-bit), and then select Install

  4. This completes the download of Office to your device. To complete the installation, follow the prompts in the "Install Office" section below.

Install Office

  1. Depending on your browser, select Run (in Edge or Internet Explorer), Setup (in Chrome), or Save File (in Firefox).

    If you see the User Account Control prompt that says, Do you want to allow this app to make changes to your device? select Yes.

    The install begins.

    Shows the progress dialog box that appears when Office is installing

  2. Your install is finished when you see the phrase, "You're all set! Office is installed now" and an animation plays to show you where to find Office applications on your computer. Select Close.

    Office is installed now. Select Close

Activate Office

  1. To open an Office app, select the Start button (lower-left corner of your screen) and type the name of an Office app, like Word.

    If you have Windows 8.1 or 8.0, type the name of an Office app on the Start screen.

  2. To open the Office app, select its icon in the search results.

  3. When the Office app opens, accept the license agreement. Office is activated and ready to use.

Note: The Activation Wizard appears if Office has trouble activating. Complete the steps in the wizard to finish activating Office.


Install Office for Mac

  1. Once the download has completed, open Finder, go to Downloads, and double-click Microsoft Office installer.pkg file (the name might vary slightly).

    The Downloads icon on the Dock shows the Office 365 installer package

    Tip: If you see an error that says the Microsoft Office installer.pkg can't be opened because it is from an unidentified developer, wait 10 seconds and move the downloaded file to your desktop. Hold Control + click the file to launch the installer.

  2. On the first installation screen, select Continue to begin the installation process.

    First Mac 2016 installation screen with "Continue" highlighted
  3. Review the software license agreement, and then click Continue.

  4. Select Agree to agree to the terms of the software license agreement.

  5. Choose how you want to install Office and click Continue.

  6. Review the disk space requirements or change your install location, and then click Install.

    Note: If you want to only install specific Office apps and not the entire suite, click the Customize button and uncheck the programs you don't want.

  7. Enter your Mac login password, if prompted, and then click Install Software. (This is the password that you use to log in to your Mac.)

    Enter your admin password to begin installing
  8. The software begins to install. Click Close when the installation is finished.

    Shows the final page of the installation process, indicating that the installation was successful.

Launch an Office for Mac app and start the activation process

  1. Click the Launchpad icon in the Dock to display all of your apps.

    Shows the Launchpad button in the Dock
  2. Click the Microsoft Word icon in the Launchpad.

    Shows the Microsoft Word icon in a partial view of the Launchpad
  3. The What's New window opens automatically when you launch Word. Click Get Started to start activating.

    Start activating Word 2016 for Mac

32/64 BIT


THANKS AND ENJOY !!!!!!!

Share: