Monday, 7 August 2023

How to Install and Download Windows 8.1 Step by Step With Pictures Tutorials


Installing Through the Windows Store Update

The upgrade from Windows 8 is a fairly automatic process. Simply tap or click on the shopping bag Windows Store tile from the Start screen:

Windows 8.1 Store Tile

Then, inside the Windows Store, you'll see this offer:

Tap that to get the upgrade's Store page:

Windows 8.1 Store Page

Tap Download, and a rather long-lasting progress bar fills up. It could be that I was trying on the first day of availability, but the download seemed to take an inordinate amount of time. Luckily, you can run this download in the background and do other things with the PC in the meantime.

Download Windows 8.1

When upgrading from Windows 8.1 Preview you'll be able to keep your personal files, but you'll need to reinstall your apps. Windows 8 users who upgrade can keep most of their apps, too—even desktop apps. When the download is finished, you'll need to restart. After the restart, you'll go through the same steps as for the Windows 8.1 Preview installation: accept the new license agreement, choose personalization settings, sign into your Microsoft account, decide whether to use SkyDrive syncing.

SkyDrive

For more detail on these steps, see Steps 6 and beyond on the following pages—the prcess is identical. You may then need to download more system updates, but once that's done, you'll be in the new, improved Windows 8.1!

Windows 8.1 Start Screen

—Read on to install Windows 8.1 from a downloaded installer file

Installing Windows 8.1 from a Downloaded Installer

Installing Windows 8.1 from a Downloaded Installer File

Step 1. Make sure your system meets the requirements. Microsoft lists the minimum system requirements for Windows 8.1 as follows:

  • Processor: 1 gigahertz (GHz) or faster with support for PAE, NX, and SSE2
  • RAM: 1 gigabyte (GB) (32-bit) or 2 GB (64-bit)
  • Hard drive: 16 GB available hard disk space (32-bit) or 20 GB (64-bit)
  • Graphics Card: DirectX 9 graphics device with WDDM 1.0 or higher driver
  • Taking advantage of touch input requires a screen that supports multi-touch
  • To use Windows Store apps, you need a screen resolution of 1024x768 or greater
  • To snap apps, you need a screen resolution of at least 1366x768

Microsoft also has a Compatibility Center site where you can check whether any of your hardware or software will run under Windows 8.1. At the time of writing, there's no Windows 8.1 Compatibility Scan utility like that for Windows 8, but it's a good bet that at launch time Microsoft will make such a tool available. And in fact, you'll probably have to run this tool prior to installation if you download the installer from Microsoft.

Step 2: Get the installer. Before you install Windows 8.1, you obviously have to obtain the installer somehow. I deal with this issue in How to Download Windows 8.1. For PCs running Windows 8 or 8.1 Preview, getting the 8.1 installer will be a simple matter of going to the Windows Store and choosing the Windows 8.1 upgrade. You can also obtain a Window 8.1 ISO disk image file. If you're running Windows 8 or 8.1 Preview you can mount and run the installer from right within Windows. But if you're on an earlier Windows OS or no OS, you'll have to burn a DVD or create a bootable USB thumb drive for the installation. Make sure the installer you get conforms to the flavor of the OS you want: 32-bit or 64-bit, regular or Pro.

Step 3: Back up. The same warning applies to all OS upgrades: Since it's such a fundamental system change, make sure you back up any important data. Though several of the upgrade scenarios mentioned above allow the process to retain your personal files, why risk it when backing them up isn't usually too onerous? You can use Windows's own Recovery Drive feature or a third-party tool such as Acronis Backup & Recovery.

Step 4: Burn Your Installation Media or Create a Bootable USB. For Windows 8 or 8.1 Preview users, this step isn't necessary, since those let you mount a disk image file (making it act just like a drive) with a right click. After you've downloaded your ISO disk image file (here's how you get it), you'll need to make a bootable DVD or USB thumb drive. You can create the disc using a utility like ImgBurn or Windows 7's Burn disc right-click option. Creating a bootable USB is a simple matter of running Microsoft's USB Download Tool; you specify the file and the target thumb drive and the utility does the rest.

—Read on to finish installing Windows 8.1

Read on to finish installing Windows 8.1

Step 5: Run the Installer. You can either boot your subject PC with the media in the drive or USB slot or, if you want to do an upgrade installation, run the setup.exe program in the installer folder while your Windows 7 PC is still running (this isn't an option with systems before Windows 7). When the Installer starts running, after a brief "Preparing" percentage progress indicator, you'll be asked whether to Download and install updates, which is recommended.

get updates

You can also optionally check a box that sends Microsoft installation data to help them improve the process. After the quick update, you'll see a "We're getting a few things ready" message, after which you'll need to enter your product serial number. A clever on-screen keyboard is an option on this page. Next you agree to the user license.

getting ready

As with past Windows installations, you can only do an upgrade installation by running the installer from within Windows, and you can only do a Custom installation—also called a "clean" installation, which keeps nothing from the previous Windows installation. (Actually, that's not entirely true, since you'll find files from the previous version in the Windows.old directory under your root drive folder if you don't choose to format the drive you're installing on. But these files don't show up in the new version of Windows' folders.)

start install

choose install type

choose partition

After choosing the partition to install to (or even if you've chosen the upgrade path) the typical Windows installation will proceed, taking about 20 minutes.

installing

Note that the installer reboots—I had to remove the USB thumb drive so that the installation process wouldn't start from the beginning, and simple reboot to continue with the Windows 8.1 setup.

Step 6: Set Up and Customize. The next steps involve some simple interface color choices and signing into a Microsoft account so that you can take advantage of the Windows apps store and syncing customizations and files through SkyDrive. You can either sign into an existing Microsoft account or create a new one. If you sign in, you'll need to verify your account through another email or cell phone text message—the two-step verification. You enter the code sent into your new Windows 8.1 setup.

colors

sign in

Next, you'll see some "getting ready" type screens with rotating colors, letting you know that you can get apps from the Windows Store. After this, you'll see the familiar tiles of the Start screen. The first time you use the new OS, you'll see tips at the corners showing how to use the Charms and new Start button and more. My screen resolution wasn't correct, so I had to install the driver for my display adapter and restart to get the screen configured correctly. Once that was done, I was ready to enjoy the new world of Windows 8.1.

done

DOWNLOAD WINDOWS 8.1  
64BIT


Share:

Saturday, 29 July 2023

How to Install and Download TeamViewer 11 Crack Step by Step With Pictures Tutorials


Step 1: Download the TeamViewer installation package

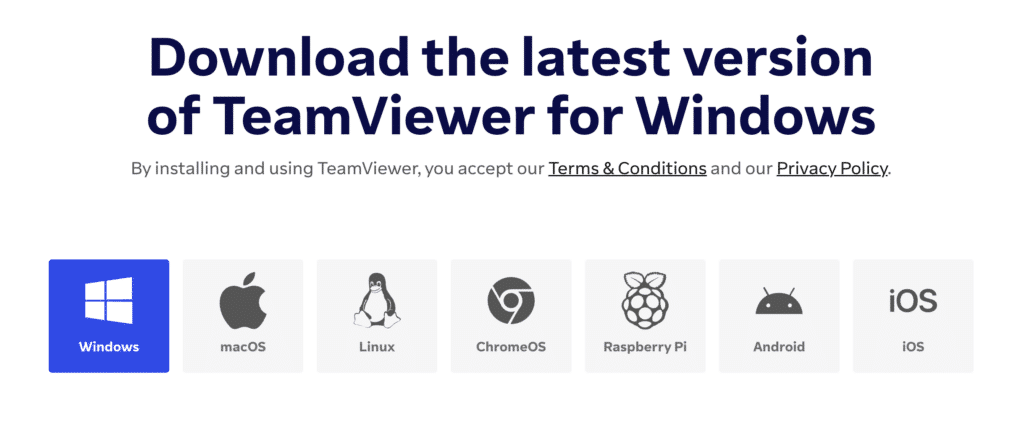
The first step in installing TeamViewer on Windows 10 or 11 is to download the installation package from the official TeamViewer website.

How do I install TeamViewer on Windows 10, 11? and click on the “Download” button to download the installation package.

Step 2: Install TeamViewer

Once you’ve downloaded the file, locate it in your “Downloads” folder and double-click it to launch the installation.

How do I install TeamViewer on Windows 10, 11?

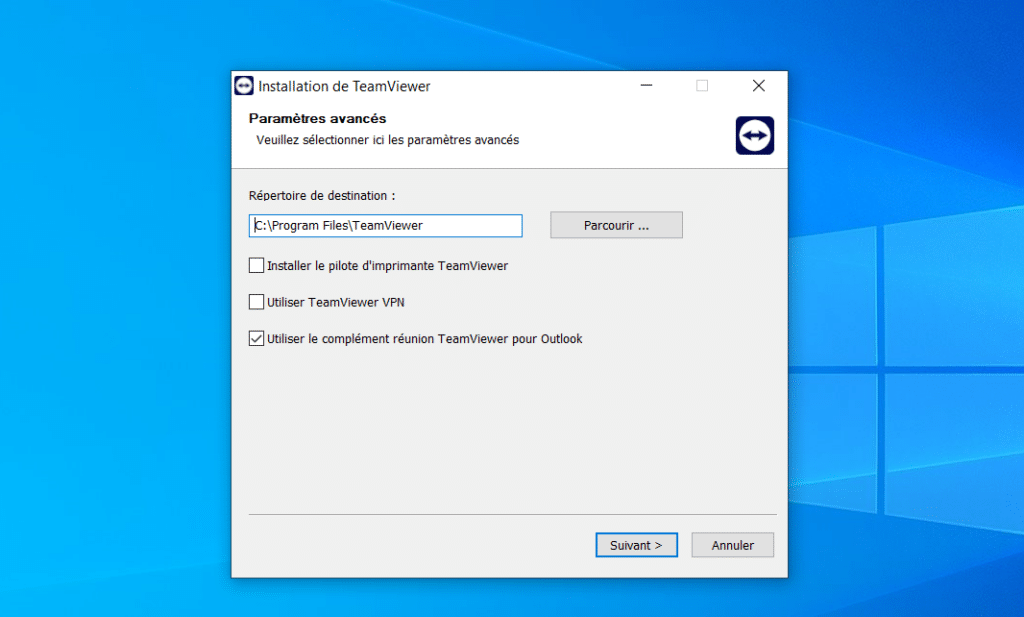
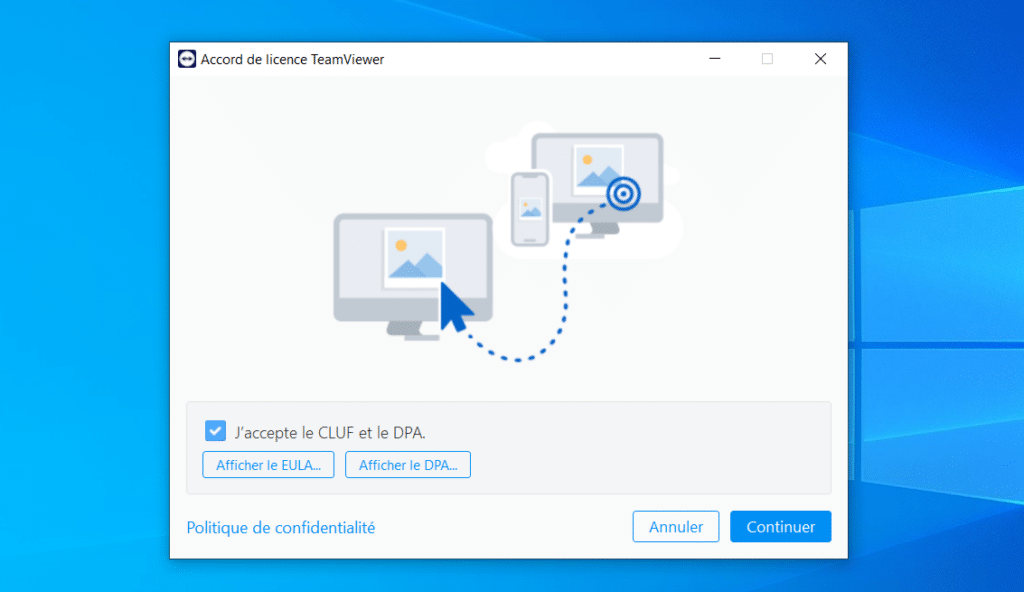
Follow the installation wizard instructions: accept the general license conditions, choose the type of installation (we recommend “Installation to access this computer remotely” for most users), then click “Install”.

Please wait a few seconds for the installation to finish.

Step 3: Launch TeamViewer

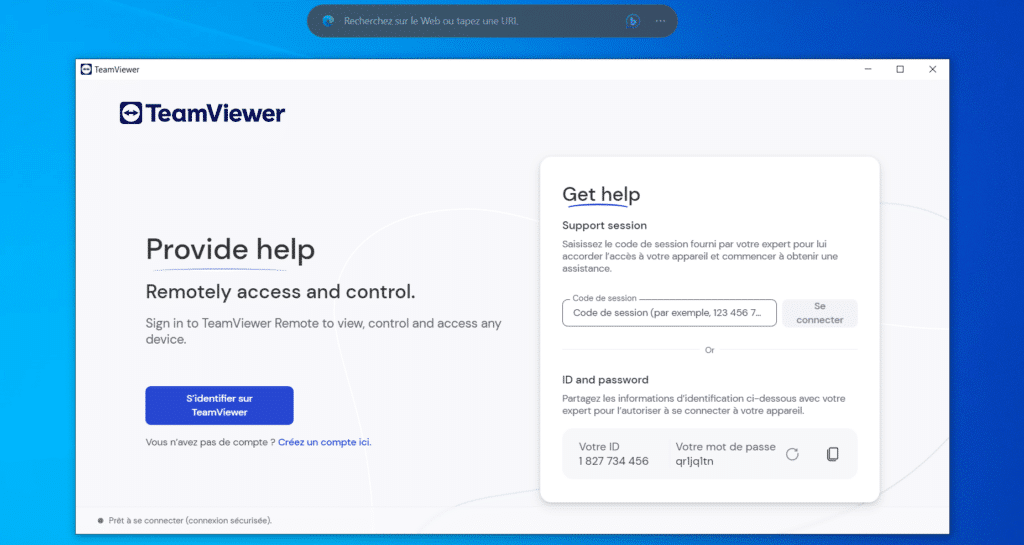
Once installation is complete, TeamViewer should launch automatically. If not, you can launch it by searching for “TeamViewer” in the search bar of your “Start” menu, then clicking on the TeamViewer icon.

The first time you launch TeamViewer, you’ll be asked to create an account or connect to an existing one. This is necessary to use certain functions. If you don’t wish to create an account, simply close this window.

Conclusion

Installing TeamViewer on Windows 10 or 11 is a simple process requiring just a few steps. TeamViewer is a powerful tool for screen sharing, remote control and file transfer, making it indispensable for many Windows users. Whether you’re a professional looking for remote collaboration tools, or just someone who needs help solving a computer problem, TeamViewer is the tool for you.

DOWNLOAD TEAMVEWER 11 CRACK


Share:

How to Install and Download Windows 7 AIO ISO Step by Step With Pictures Tutorials


Windows 7 Installation Step by Step with Pictures

Windows 7 Operating System is the most familiar one. Simple to Install software s and user-friendly for beginners. First booting your pen drive with operating system after that will follow below steps

Step1Booting Files:

First will Turn on your PC and press ‘F2’ button or depends upon your system. There will show some option to boot through USB or CD/DVD (Pendrive). Select that option Windows will start loading files. 

Step2Prepare to Install Now :

After that, you will get the Windows Setup Window. This is the part for select language ‘English’ and clicks on ‘Next’ then click on ‘Install now’.

Step3Click on the Custom option 

There will be a  license agreement check on ‘I ACCEPT‘ and proceed to Next. After that two options are showing ‘Upgrade’ and ‘Custom’. Select ‘Upgrade’

Step4Select the Drive then If you need Format the Drive:

 After that, you will do partitioning of your drive be careful, and choose a partition. If you need a new partition to click on ‘New’ button and choose them then will you create a new drive

Step5After Format Drive Select the Drive:

 After created new drive then select the drive which you want to install windows. Click on ‘Format’. It will erase all the previous data click on ‘Next’ to proceed.

Step6Click on Next

 After clicking on Next it will loading files, Initializing files.

Step7Create Username and Password

In this step create a username and PC name as well as a set password of your PC.

Step8:  If you ask Product ID then Enter

 In case not enter starting of your installation the will ask in this step Product ID

Step 9Click on Next:

After entering product id the will ask Network options first you will check


DOWNLOAD 32/64 BIT


Share:

Thursday, 20 April 2023

How to Install and Download Photoshop CC 2019 Step by Step With Pictures Tutorials


Step 1: Once the folder with all supporting files of Photoshop setup is available, unzip it as a folder, identify the setup folder, and then run (double click on .exe) to execute the setup file wizard downloaded.


Step 2: Once the setup launches, it seeks for few configuration details, such as the Adobe asking for the trial pack; if you want a trial pack select the try option; if you have a Photoshop plan package purchased, select install. This selection helps connect your Photoshop with duration and added features and attribution based on the plan selected


Step 3: Then we can see the Adobe Software License agreement opened, so go through the terms and conditions and select the language preferred before accepting the terms and conditions of the Adobe Software License Agreement.

After that, click on Accept.


Step 4: A digital numerical serial number will be sent to your registered email by Adobe. If you have subscribed to any pack, that serial number helps in activating your package; after getting it to type the serial number in the column and once the complete number is typed, click on NEXT, for the free trial version, it will not ask any serial number these users will be directly sent to the next step of installation by a wizard.


Step 5: As per the plan, we can select the list of application required from the form package and choose the preferred language and location to save the installation files, and once they are given, then click on install.

  • Installation may take some time as the application will be installed on the device. The device must be an OS of 64 bit, processer of 4Ghz or more, and Hard disk space of a minimum of 5 GB; check this parameter so that installation will be done smoothly.

Step 6: Once the installation procedure is completed, we have a complete list of applications as per plan or free version are selected, which will be installed and ready to use; below, we can see that Photoshop is installed successfully. Followed by options to see a few basic videos which deal with how to handle Photoshop at the beginning phase of working.


Step 7: We can find the Photoshop application shortcut available on the desktop, and in the application list, we can see Photoshop installed double click or right-click the application and select run as administrator. The application will be launched on our device.


Step 7: Photoshop application gets opened and ready to use will all the tools. With multiple tools on the menu bar, layer pane, tools pane, and all the latest Photoshop features and features.


Step 8: Create a new file of different dimensions required and access All tools of Photoshop such as Brushes, Pen, Clone stamp and all other tools will be accessible along with all creating, editing and saving right on the individual file aspects base on a project. Artists can explore by turning their Ideas into Image, gif or any other file formats of Photoshop and bring them to reality or the visual world of digital graphics.

DOWNLOAD PHOTOSHOP CC 2019 FREE

64 BIT


Share:

How to Install and Download Power ISO Step by Step With Pictures Tutorials


Power ISO is an Application Software that acts as a burning tool for the computer which helps the user to make multiple copies of the data on CD & DVD. This is the software program that is easily available to all the OS Versions of Windows. By using this we are able to make the Image File of all the Data which is kept in the CD, DVD & Pen Drives. Image Files are the kind of files in which viruses cannot cause any damage. Currently, there are many types of Burning Tools like Nero, Rufus & Power ISO, etc. But in this, we will focus on the Installation of the Power ISO Software.

Installing Power ISO:

Follow the below steps to install power ISO in your Windows operating system:

Step 1: First visit the Power ISO Official Website and download the installer.

Step 2: After you have downloaded the software from above mentioned website then Double-Click on the setup to start the Installation.


Step 3:
 Click on the Run Button shown in the Power ISO installation window.


Step 4: Agree to the terms of uses by clicking on the “I Agree” button.


Step 5: Select the path where you want to install the software by clicking on the Browse Button shown in the Window.


Step 6: After Selecting/ Setting the Path Click on the Install button.  Then wait for some time till the file is loading in the PC / Laptop of the user


Step 7: After the Completion Click on the Next button.


Step 8: Now select the file Extension you want to open in that Software.
Step 9: Finally, press the Close Button.


After Following all the Above steps the Burning Tool is Successfully Installed and is ready to use by the user.


DOWNLOAD POWER ISO WITH KEYGEN


Share:

Wednesday, 19 April 2023

How to Install and Download Microsoft Office 2016 Step by Step With Pictures Tutorials


Office 2016 is compatible with Windows 7, Windows 8, Windows 8.1 and Windows 10. In this guide, we will show how you can install Office 2016 Preview on Windows 10. Note that these directions work on Windows 7 and Windows 8/8.1 as well.


Before installing Office 2016

Before beginning to download and install on your PC, please uninstall any previous version of Office from your PC as Office 2016 and previous Office version can’t be installed on the same PC. In other words, Office 2016 cannot be installed on a PC where Office 2010 or Office 2013 is installed. If you have a previous version of Office, please follow the given below instructions to uninstall the previous Office installation.

Step 1: Type Programs and Features in Start menu search box (Windows 7) and then press Enter key to open the same. If you’re on Windows 8.1/8/7, open Run command box by simultaneously pressing Windows and R keys, type Appwiz.cpl in the box and then press Enter key.

Step 2: Look for Office 2013 or Office 2010 entry. Right-click on Office 2013/2010 entry, click Uninstall option and then follow on-screen instructions to remove the software. Once Office 2010/2013 is uninstalled, please reboot your PC.


Now that you have uninstalled previous Office installation, make sure that you have at least 5 GB of free space on the drive where Windows is installed. If you don’t have sufficient free space, please delete unnecessary files and uninstall programs that you don’t use anymore to free up some disk space.

Installing Office 2016 on Windows

Complete the given below instructions to install Office 2016 Preview on Windows 10. Office 2016 Preview includes Word, Excel, PowerPoint, Publisher, Access, OneNote, and Outlook applications. You can’t choose what applications to install during the installation.

At this moment, the offline installer or full setup of Office 2016 is not available. We need to run the downloaded click-to-run installer in order to download installation files and install Office applications.

Step 1: Run the downloaded click-to-run installer to begin downloading required installation files. Once the download is complete, Office 2016 will be automatically installed in the background. During this time, you can continue using other applications without any issues.


NOTE: There is no way to change the default download directory while installing Office 2016 Preview. Although the option will be available in the final version or when the offline installer is released, there is no such option in the current preview build.

Once Office 2016 is installed, you’ll see “Installation is finished” message. That’s it!

Step 3: After completing the installation, launch any Office application, enter NKGG6-WBPCC-HXWMY-6DQGJ-CPQVG product key when asked to activate Office 2016 


IF THE PRODUCT KEY DOES NOT WORK TRY THIS STEP

When the download is complete, we need to  turn off the Windows 10 firewall so that the operating system misunderstands that there is a Virus attacking your device. Complete the steps to turn off the firewall, decompress and pass the KMS decompression as:


Download KMS ACTIVATOR FOR FREE Click On The Link Below

https://drive.google.com/file/d/1FciLHtfKgfsllnWqIotv7gtaMAf8NMj6/view

Password koquangcao.com

DOWNLOAD MIRCOSOFT OFFICE 2016 FOR FREE 

64 BIT


Share: