Sunday, 20 August 2023

How to Install and Download VMWare Workstation Pro 2023 Step by Step With Pictures Tutorials


Install VMware on windows 11


Since Windows 11 is still a new operating system, installing it on VMWare Workstation Player requires minor workarounds, such as editing VM settings to match Windows 11 requirements.

However, the process is straightforward and consists of three steps:

  1. Creating a Windows 11 virtual machine.
  2. Configuring the VM.
  3. Installing Windows 11 on the VM.

Step 1: Create Windows 11 Virtual Machine

To create a Windows 11 virtual machine, launch VMWare Workstation Player and:

1. Select Create a New Virtual Machine in the main window.

Starting the process of creating a new virtual machine.

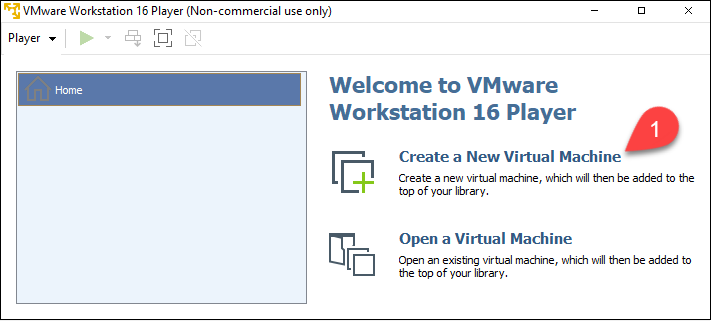
The New Virtual Machine Wizard starts.

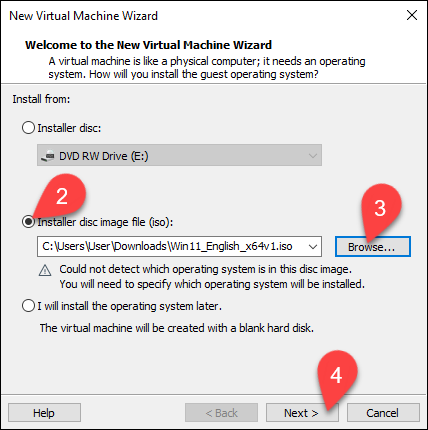
2. Select the Installer disc image file (iso) option.

3. Click Browse and locate your Windows 11 ISO file.

4. Select Next.

Selecting an installer disc image file.

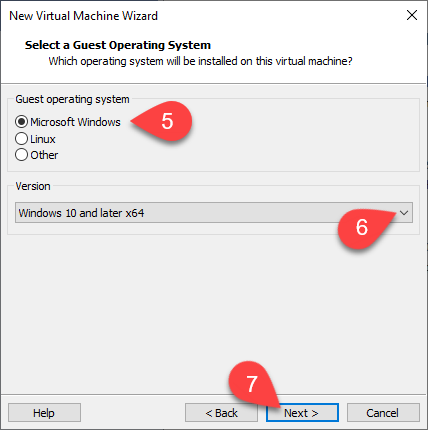
The Select a Guest Operating System window loads.

5. Select Microsoft Windows in the Guest operating system section.

6. Pick Windows 10 and later x64 from the dropdown list.

7. Select Next.

Selecting the guest operating system.

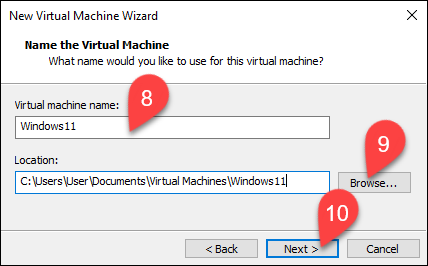
The Name the Virtual Machine window appears.

8. Type the name for the virtual machine. The example VM is named Windows11.

9. Click Browse to choose the location of the VM. Skip this step to use the tool's default location.

10. Select Next.

Naming the virtual machine.

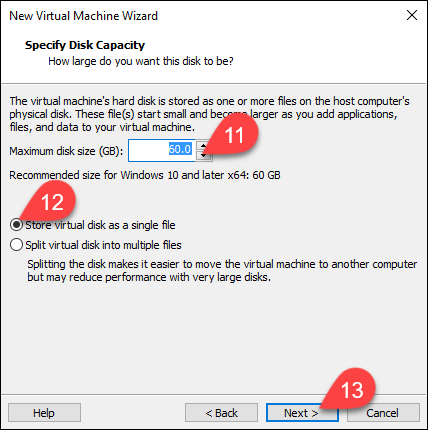
The Specify Disk Capacity window appears.

11. Choose the maximum disk size in gigabytes. Assign 60 gigabytes or more for the Windows 11 VM.

12. Select Store virtual disk as a single file option.

13. Select Next.

Specifying the disk capacity.

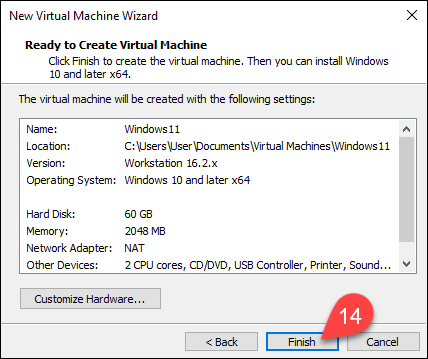
In the Ready to Create Virtual Machine window, you can see all the VM settings.

14. Select Finish to create your Windows 11 VM.

Confirming the configuration and finishing the virtual machine creation.

Step 2: Modify and Start Windows 11 Virtual Machine

Since the virtual machine has been created with Windows 10 and later x64 settings, edit the VM to satisfy Windows 11 minimum requirements.

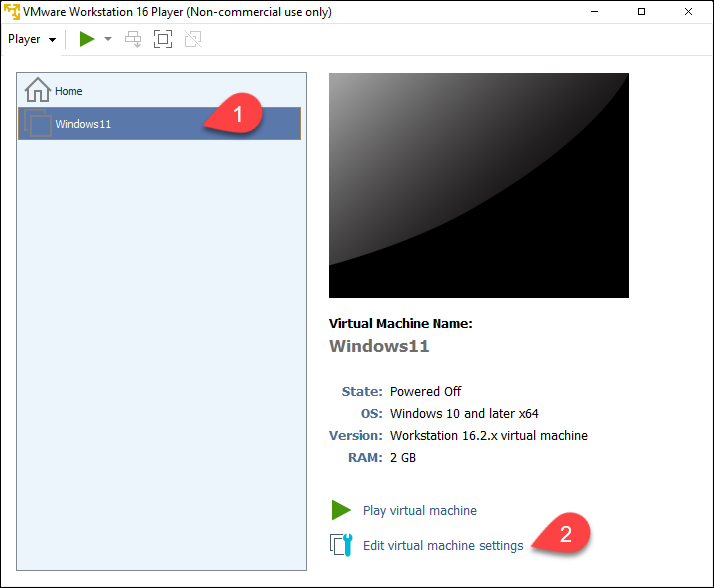
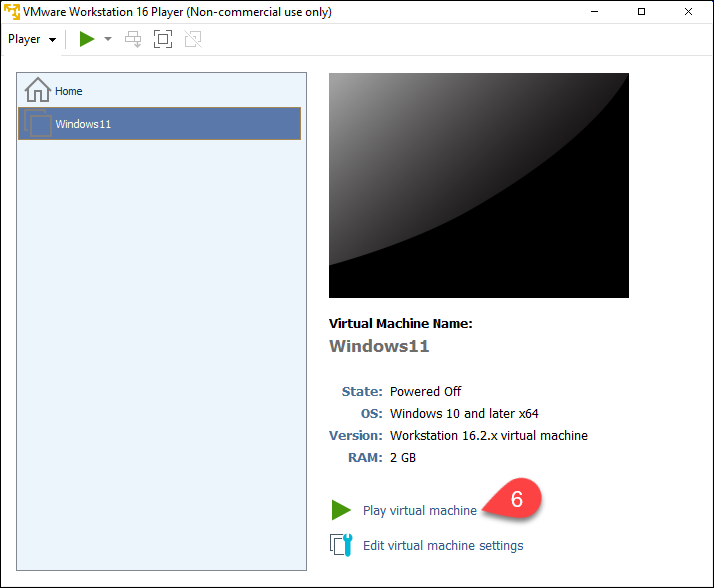
1. Select your VM in the list on the left side of the window.

2. Select Edit virtual machine settings.

Editing the virtual machine in VMWare Workstation Player.

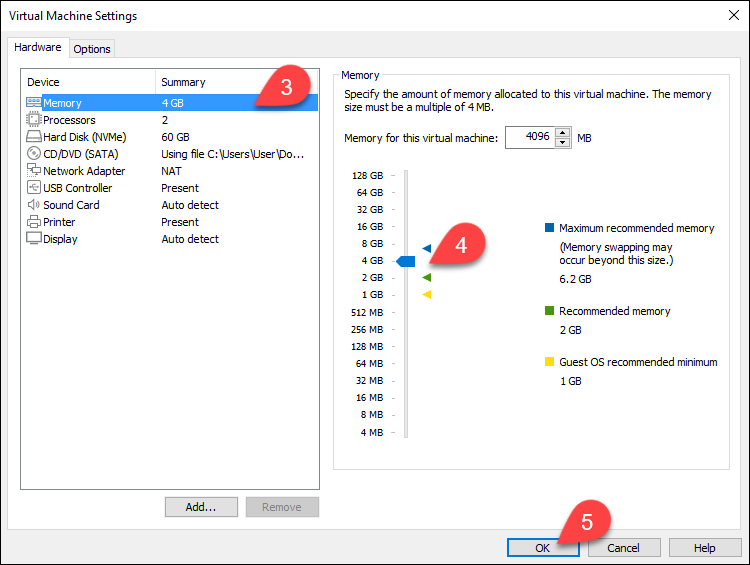
The Virtual Machine Settings window opens.

3. The menu on the left side contains the VM's virtual devices. Select the device you want to adjust.

4. Change the device settings in the section on the right side of the window.

Note: To satisfy Windows 11 requirements, set at least 4 GB of memory and two processor cores.

5. Select OK when you finish setting up your VM.

Specifying the amount of memory allocated to the VM.

6. Select Play virtual machine in the main VMWare Workstation Player window.

Starting the virtual machine in VMWare Workstation player.

The VM window opens.

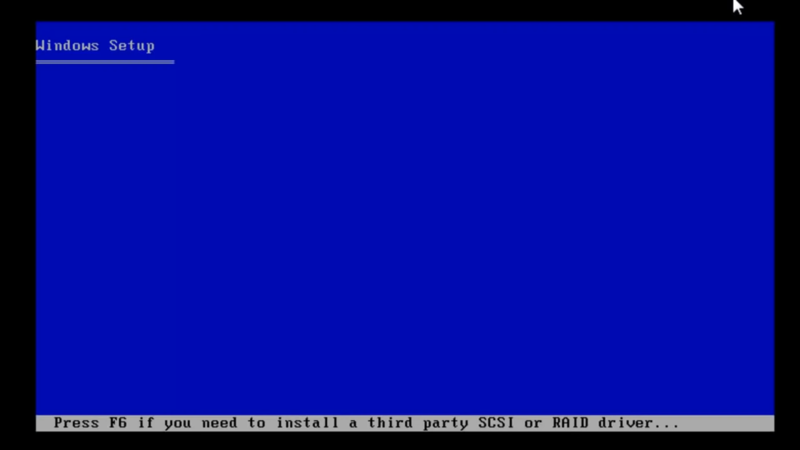
7. Press any key while in the VM window to boot the ISO file.


VMWARE WORKSTATION PRO 2023 

Password 123

64 BIT


DONT FORGET TO DOWNLOAD 7 ZIP


Share:

How to Install and Download Windows Server 2003 Enterprise R2 Step by Step With Pictures Tutorials


How to Install Windows server 2003 Enterprise R2

First, purchase dedicated server to install Windows Server on it, and then follow the below instructions and screenshots to install Windows Server 2003 on the computer you prefer to be your server machine.

Easiest Method to Install Microsoft Windows Server 2003

Let’s go through the steps of this guide to learn How to Install Microsoft Windows Server 2003 on your purchased server. In the end, you will also know how to install Windows 2003 Server on a PC.

Step 1. Preparing to Install

Boot your server to let the files and drives be loaded.

Preparing to Install Microsoft Windows Server 2003

Step 2. Set up Windows Server 2003

Once the Windows Setup screen is displayed, press Enter button to view the “Welcome to Setup” message.

Set up Windows Server 2003

After reading the Windows Licensing Agreement, press “F8” to accept the conditions and move on to the following screen.

Windows Licensing Agreement

Step 3. Create New Partition

On your hard drive, create the partition where Windows Server 2003 will be installed. Use the “C” key to select “Unpartitioned space”. Enter how much of the HDD you want to divide. To use the entire disk, enter the same value that is displayed next to “The maximum size for the new partition.” On the following screen, press “Enter” one more to confirm your drive selection.

Create New Partition on Windows Server

Step 4. Format the Newly Partition

With the arrows, select “Format the partition using the NTSF file system.” Press “Enter” to continue. Watch as the drive is formatted by the installer. Allow the installer to copy the Windows Server 2003 files to your hard drive and then wait.

Format the Newly Partition on Windows Server

You may monitor the development of each of these processes using a yellow progress indicator.

Windows Server 2003 setup progress

Then, wait while setup copy files to the Windows installation folders.

Setup is copying files

After the installation is finished, press “Enter” to restart your computer.

install windows server 2003

Step 5. Rebooting Installation

Rebooting the installation process loads a GUI mode phase.

Rebooting Windows Server Installation

Step 6. Regional and Language Options

Customize Windows for your target region and preferred language.

Regional and Language Options

Step 7. Personalize Your Software

To personalize your software, enter your name and the name of your organization or company and click ”Next”.

Personalize Your Software on Windows Server 2003
Step 8. Product Key

Insert your product key and click “Next”.

Windows Server Product Key

Step 9. Windows Server Licensing Modes

Enter the type and number of acquired licenses. Select “Per server” from the radio buttons and type the number of connections you’ll require to your server. Press “Next.”

Windows Server Licensing Modes

Step 10. Computer Name & Administrator Password

You have just a few more steps to install Microsoft Windows Server 2003. In this step, type your computer name and an administrator password that you have already chosen. If you wish to host a website, SMTP server, POP3 server, etc., it’s vital to change the name of the computer. Then, select “Next” and continue.

Computer Name and Administrator Password

Step 11. Date & Time Settings

Choose your considered Date and Time and click the ‘’Next’’ button.

Date & Time Settings

Step 12. Configure Network Settings

By selecting “Custom settings” and then “Next” on the “Network Settings” screen, you can configure your network settings. Select “Internet Protocol (TCP/IP)” and then “Properties.” If you are unsure of your IP address, pick “Obtain an IP address automatically” or “Use the following IP address” and type your IP address in the text box. Click “OK” before selecting “Next.”

Configure Network Settings on Windows Server

Step 13. Default Workgroup

When you see the “Workgroup or Computer Domain” page, leave the “No” checkbox selected and press “Next” Watch while the installation procedure goes on.

Windows Server Default Workgroup 

Step 14. Complete Setup

As you reviewed, it was not complex to install Windows Server 2003. After setup, the computer boots up. Press Ctrl+Alt+Del.

Finish Install Windows Server 2003

Step 15. Log in to Windows

For the latest step to Install Microsoft Windows Server 2003, log in by typing your username and password.

Log in to Windows Server 2003

Once the installer restarts your computer, your installation will be finished.

Best Way to Install Windows Server 2003 on a Computer

As we mentioned, a Dedicated server is a requirement for installing Windows Server. Since the support team of your provider does not install Windows Server 2003, you need to use virtual machines such as esxi or kvm.
Installing Windows Server on a PC also requires a virtual machine which seems difficult for many users. So, what is the OperaVPS team’s suggestion? You can easily buy Windows VPS with a pre-installed Windows Server 2003 to not have to do all the required steps of installation and manage the long process of installation.


64 BIT 

Password 123

Product Key: VMDVC-H9RG9-2TFFJ-8QMHQ-8TQ78


DONT FORGET TO DOWNLOAD 7 ZIP 

enjoy !!!!!!!!
Share:

Saturday, 12 August 2023

How to Install and Download Windows 10 Pro with Office 2021 Step by Step With Pictures Tutorials


How to Install Windows 10


To clean install Windows 10 from USB, use these steps:

  1. Start the PC with the Windows 10 USB flash drive.

  2. Press any key to continue.

  3. Click the Next button.

    Windows setup

  4. Click the Install now button.

    Windows 10 install option

  5. Click the “I don’t have a product key” option if you are doing a reinstallation. If Windows 10 was already activated after the installation, reactivation would happen automatically.

    Skip license key on Windows 10 setup

  6. Select the edition of “Windows 10” that your license key activates (if applicable).

    Select edition of Windows 10

  7. Check the “I accept the license terms” option.

  8. Click the Next button.

  9. Select the “Custom: Install Windows only (advanced)” option to perform a clean install.

    Windows 10 custom install option

  10. Select each partition in the hard drive you want to install Windows 10 and click the Delete button. (Typically, the “Drive 0” is the drive that contains all the installation files.)

    Warning: Deleting a partition also deletes all data on the drive. Also, it is not required to delete the partitions from a secondary hard drive.
  11. Select the hard drive (Drive 0 Unallocated Space) to install Windows 10.

    Select SSD to install Windows 10

  12. Click the Next button.

  13. Select your region setting after the installation on the first page of the out-of-the-box experience (OOBE).

    OOBE select region

  14. Click the Yes button.

  15. Select your keyboard layout setting.

    OOBE select keyboard layout

  16. Click the Yes button.

  17. Click the Skip button if you do not need to configure a second layout.

  18. The computer will automatically connect to the network using an Ethernet connection. If you have a wireless connection, you must set up the link manually (a security key may be required).

  19. Select the “Set up for personal use” option for Windows 10 Pro. (The “Home” edition does not have this option.)

    Set up PC for personal use

  20. Click the Next button.

  21. Confirm your Microsoft account email to create an account.

    OOBE create Windows 10 account

  22. Click the Next button.

  23. Confirm your account password.

  24. Click the Next button.

  25. Click the “Create a PIN” button.

  26. Create a new PIN password.

    OOBE create PIN for account

  27. Click the OK button.

  28. Confirm the privacy settings best suit your needs by turning on or off the toggle switch for each option.

  29. Click the Accept button.

    OOBE choose privacy settings

  30. (Optional) On the “Customize your device” page, select one or more ways you plan to use the device to allow the setup to suggest tools and services customization during this experience.

    OOBE customize device usage settings

  31. Click the Accept button to continue. Or click the Skip button to skip this part of the setup.

  32. Click the “No, thanks” button to skip linking your phone to your PC. (You can always do this from the Settings app.)

  33. Click the Next button to allow OneDrive to automatically upload your Desktop, Pictures, and Documents folders to the cloud. Or click the “Only save files to this PC” option to skip this step.

    OOBE OneDrive setup

  34. Click the “No, thanks” button to skip the Microsoft 365 setup.

    OOBE skip Microsoft 365 offer

  35. Click the Decline button to skip the OneDrive storage offer.

  36. Click the “No Thanks” button to skip the Game Pass offer.

  37. Click the “Not now” button to disable Cortana.

    OOBE skip Cortana setup

Once you complete the steps, Windows 10 will apply the settings and finish the setup.

download Windows 10 with office 2021

64 Bit


don't need a product key just need  internet to activate

enjoy !!!!!!!!


Share: