
How to Install Windows server 2003 Enterprise R2
First, purchase dedicated server to install Windows Server on it, and then follow the below instructions and screenshots to install Windows Server 2003 on the computer you prefer to be your server machine.
Easiest Method to Install Microsoft Windows Server 2003
Let’s go through the steps of this guide to learn How to Install Microsoft Windows Server 2003 on your purchased server. In the end, you will also know how to install Windows 2003 Server on a PC.
Step 1. Preparing to Install
Boot your server to let the files and drives be loaded.
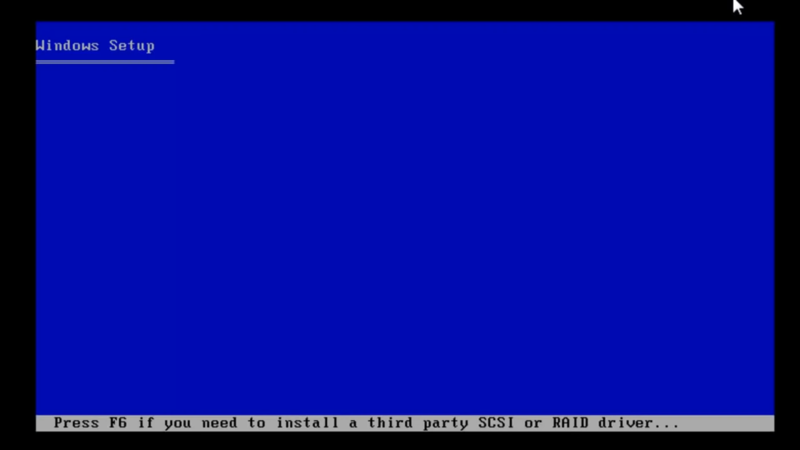
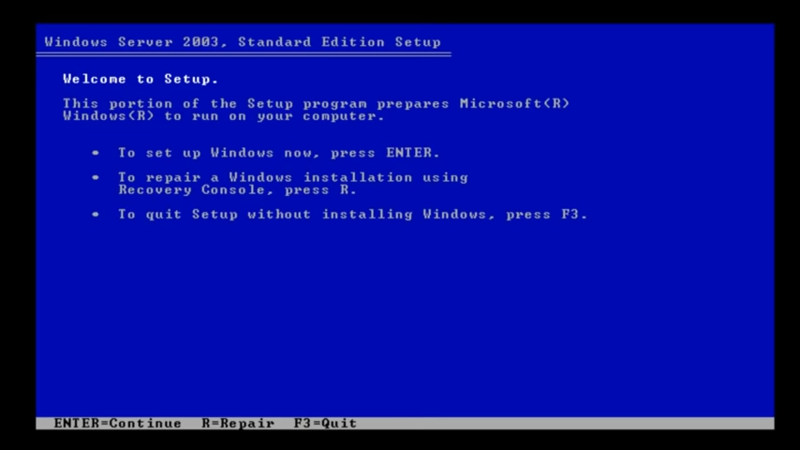
Step 2. Set up Windows Server 2003
Once the Windows Setup screen is displayed, press Enter button to view the “Welcome to Setup” message.
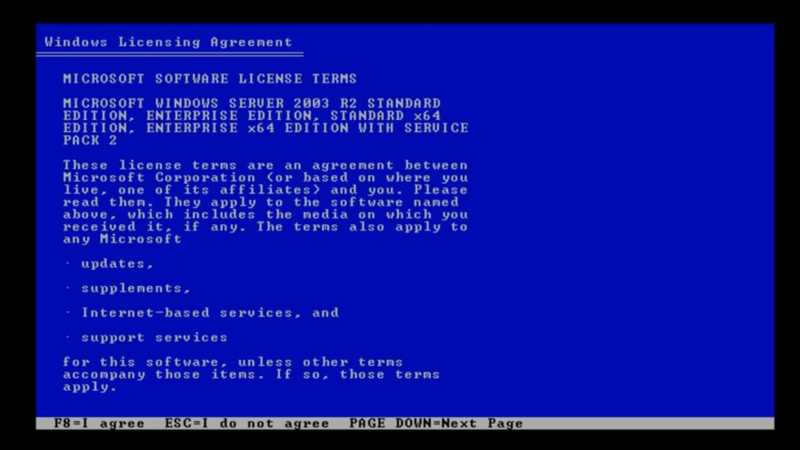
After reading the Windows Licensing Agreement, press “F8” to accept the conditions and move on to the following screen.
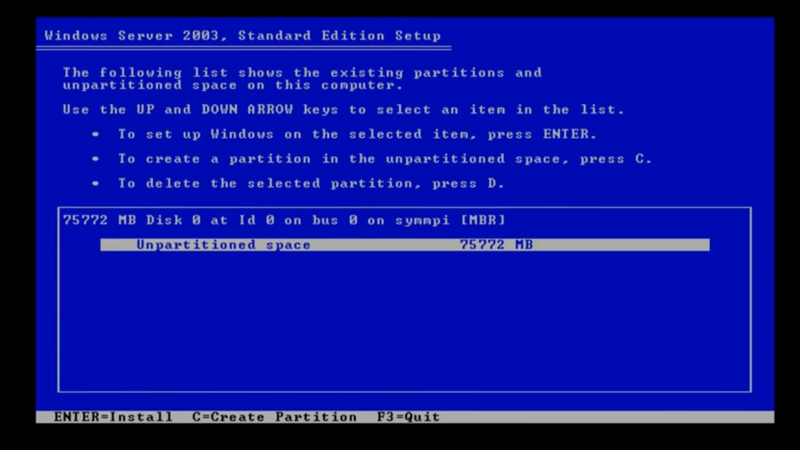
Step 3. Create New Partition
On your hard drive, create the partition where Windows Server 2003 will be installed. Use the “C” key to select “Unpartitioned space”. Enter how much of the HDD you want to divide. To use the entire disk, enter the same value that is displayed next to “The maximum size for the new partition.” On the following screen, press “Enter” one more to confirm your drive selection.
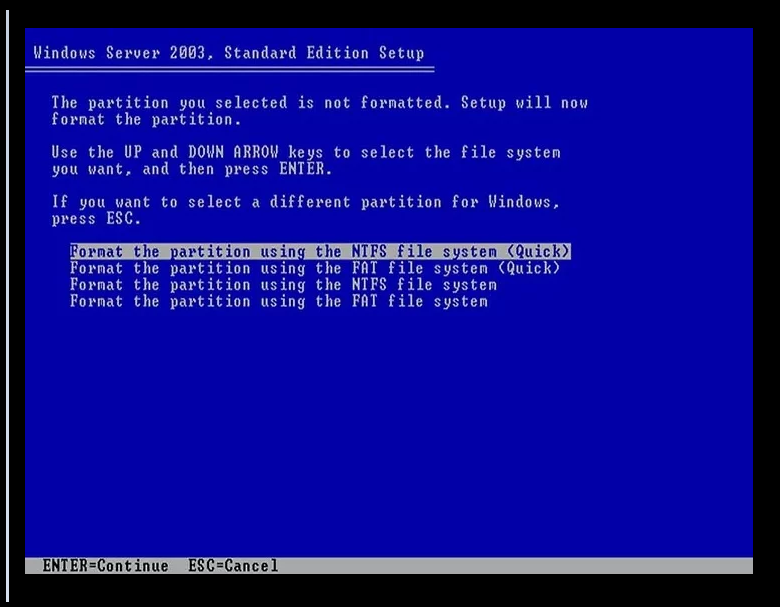
Step 4. Format the Newly Partition
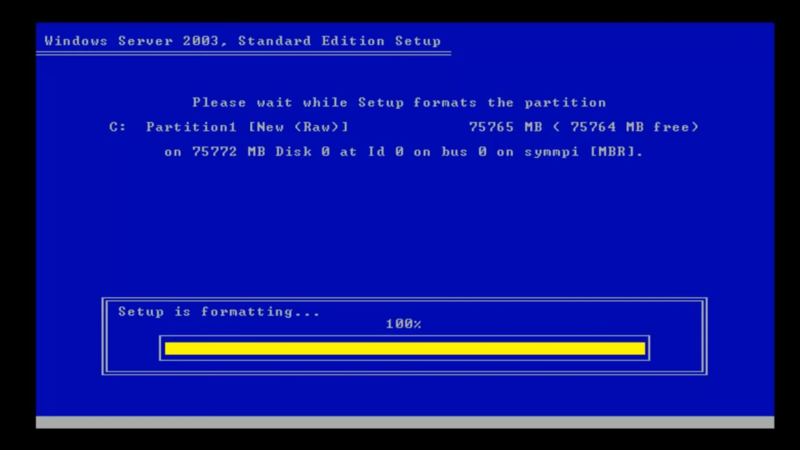
With the arrows, select “Format the partition using the NTSF file system.” Press “Enter” to continue. Watch as the drive is formatted by the installer. Allow the installer to copy the Windows Server 2003 files to your hard drive and then wait.
You may monitor the development of each of these processes using a yellow progress indicator.
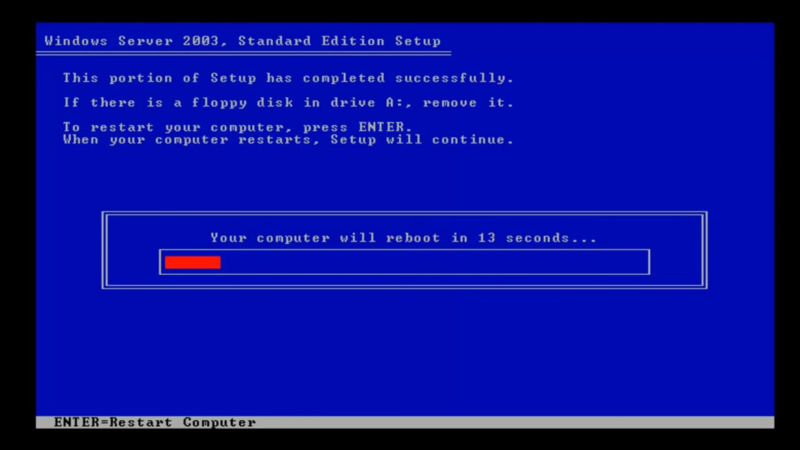
Then, wait while setup copy files to the Windows installation folders.

After the installation is finished, press “Enter” to restart your computer.
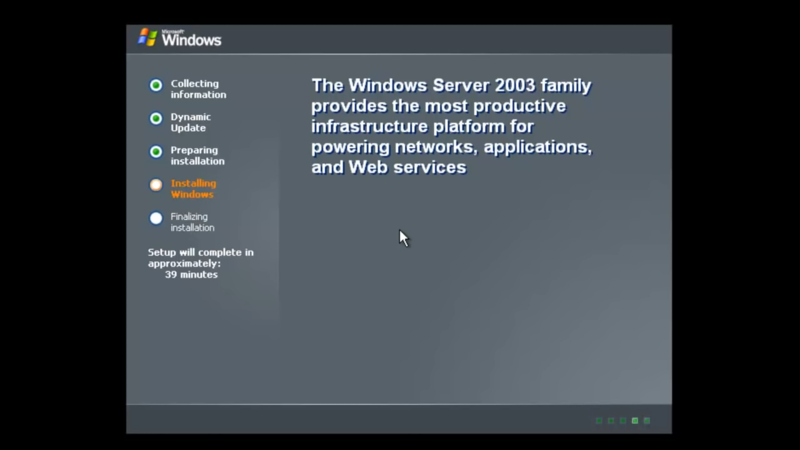
Step 5. Rebooting Installation
Rebooting the installation process loads a GUI mode phase.
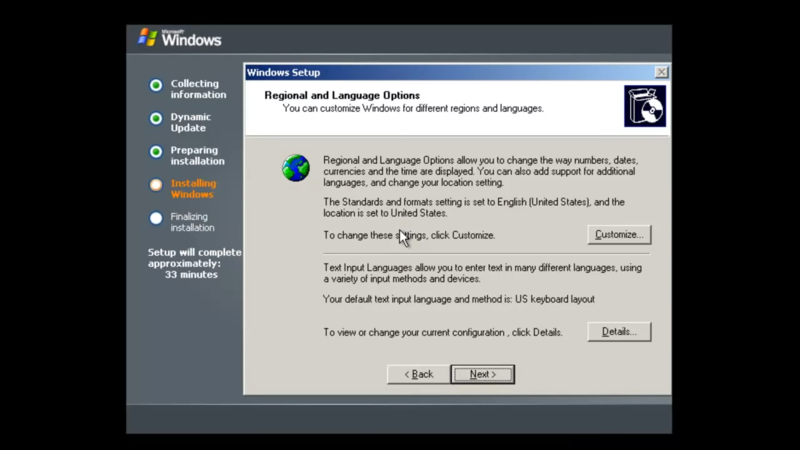
Step 6. Regional and Language Options
Customize Windows for your target region and preferred language.
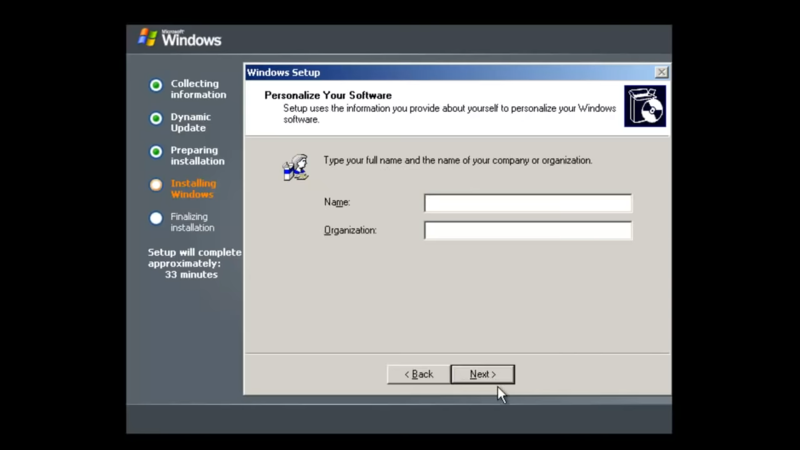
Step 7. Personalize Your Software
To personalize your software, enter your name and the name of your organization or company and click ”Next”.
Step 8. Product Key
Insert your product key and click “Next”.

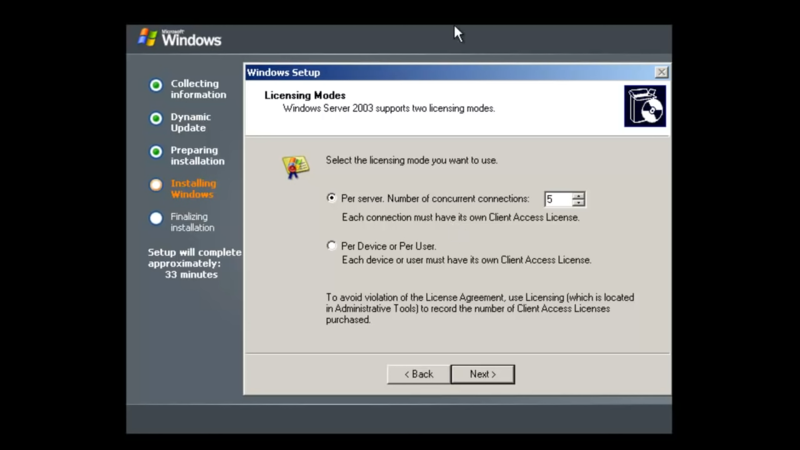
Step 9. Windows Server Licensing Modes
Enter the type and number of acquired licenses. Select “Per server” from the radio buttons and type the number of connections you’ll require to your server. Press “Next.”
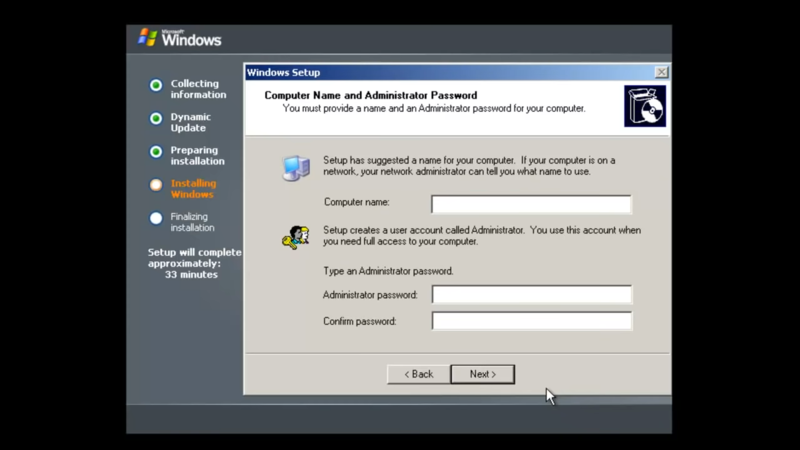
Step 10. Computer Name & Administrator Password
You have just a few more steps to install Microsoft Windows Server 2003. In this step, type your computer name and an administrator password that you have already chosen. If you wish to host a website, SMTP server, POP3 server, etc., it’s vital to change the name of the computer. Then, select “Next” and continue.
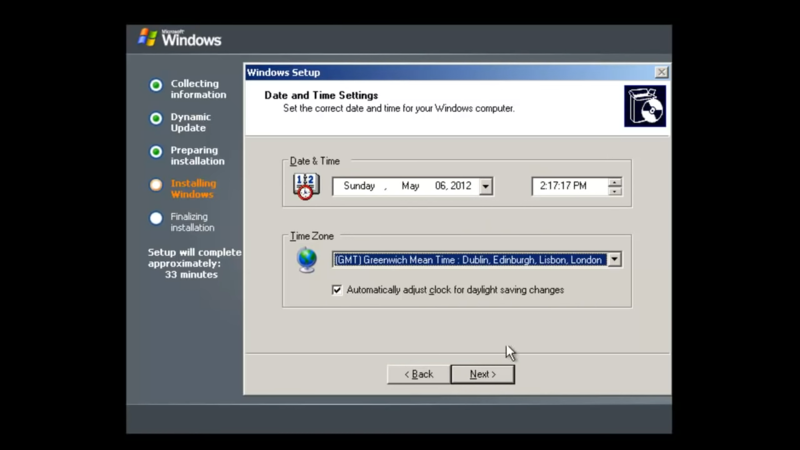
Step 11. Date & Time Settings
Choose your considered Date and Time and click the ‘’Next’’ button.
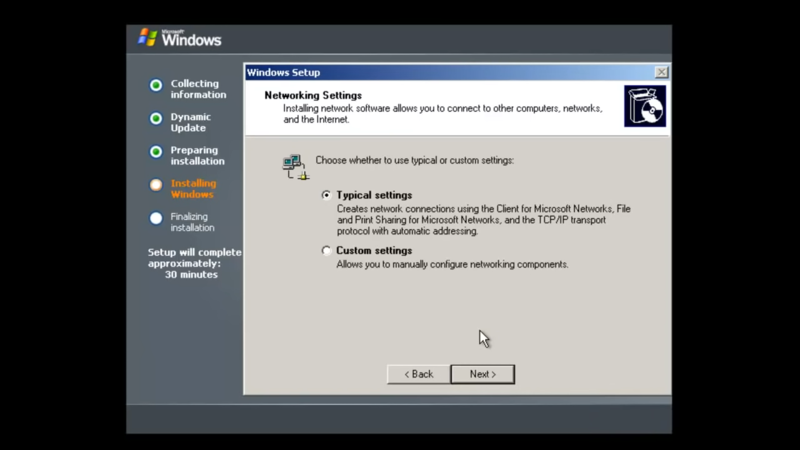
Step 12. Configure Network Settings
By selecting “Custom settings” and then “Next” on the “Network Settings” screen, you can configure your network settings. Select “Internet Protocol (TCP/IP)” and then “Properties.” If you are unsure of your IP address, pick “Obtain an IP address automatically” or “Use the following IP address” and type your IP address in the text box. Click “OK” before selecting “Next.”
Step 13. Default Workgroup
When you see the “Workgroup or Computer Domain” page, leave the “No” checkbox selected and press “Next” Watch while the installation procedure goes on.

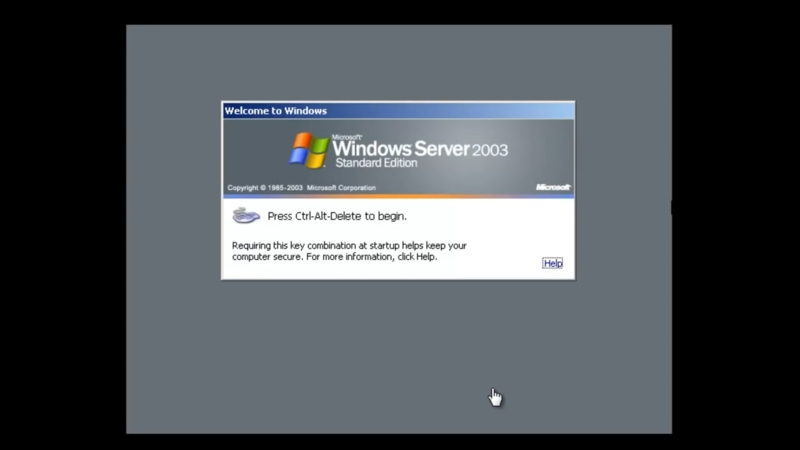
Step 14. Complete Setup
As you reviewed, it was not complex to install Windows Server 2003. After setup, the computer boots up. Press Ctrl+Alt+Del.
Step 15. Log in to Windows
For the latest step to Install Microsoft Windows Server 2003, log in by typing your username and password.
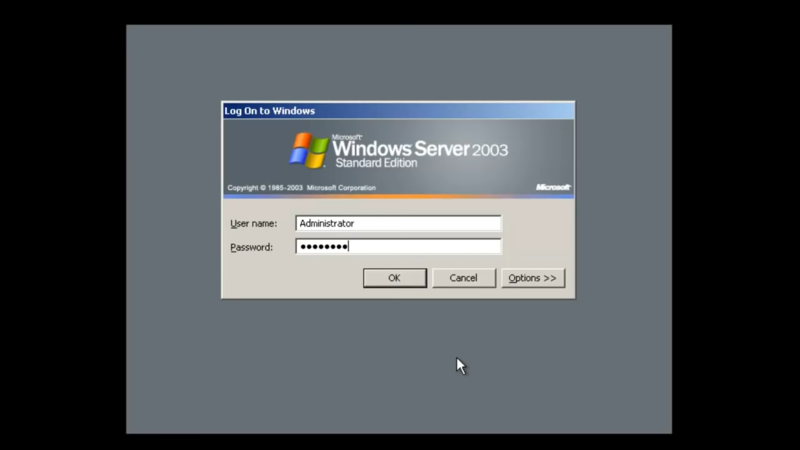
Once the installer restarts your computer, your installation will be finished.
Best Way to Install Windows Server 2003 on a Computer
As we mentioned, a Dedicated server is a requirement for installing Windows Server. Since the support team of your provider does not install Windows Server 2003, you need to use virtual machines such as esxi or kvm.
Installing Windows Server on a PC also requires a virtual machine which seems difficult for many users. So, what is the OperaVPS team’s suggestion? You can easily buy Windows VPS with a pre-installed Windows Server 2003 to not have to do all the required steps of installation and manage the long process of installation.

0 comments:
Post a Comment